By Brian · July 17, 2026
How to Decorate a Christmas Tree (Like You Hired Someone)
The professional method for decorating a Christmas tree, step by step: fluffing, lights first (with real per-foot counts), ribbon technique, ornament layering, the topper, and the skirt.
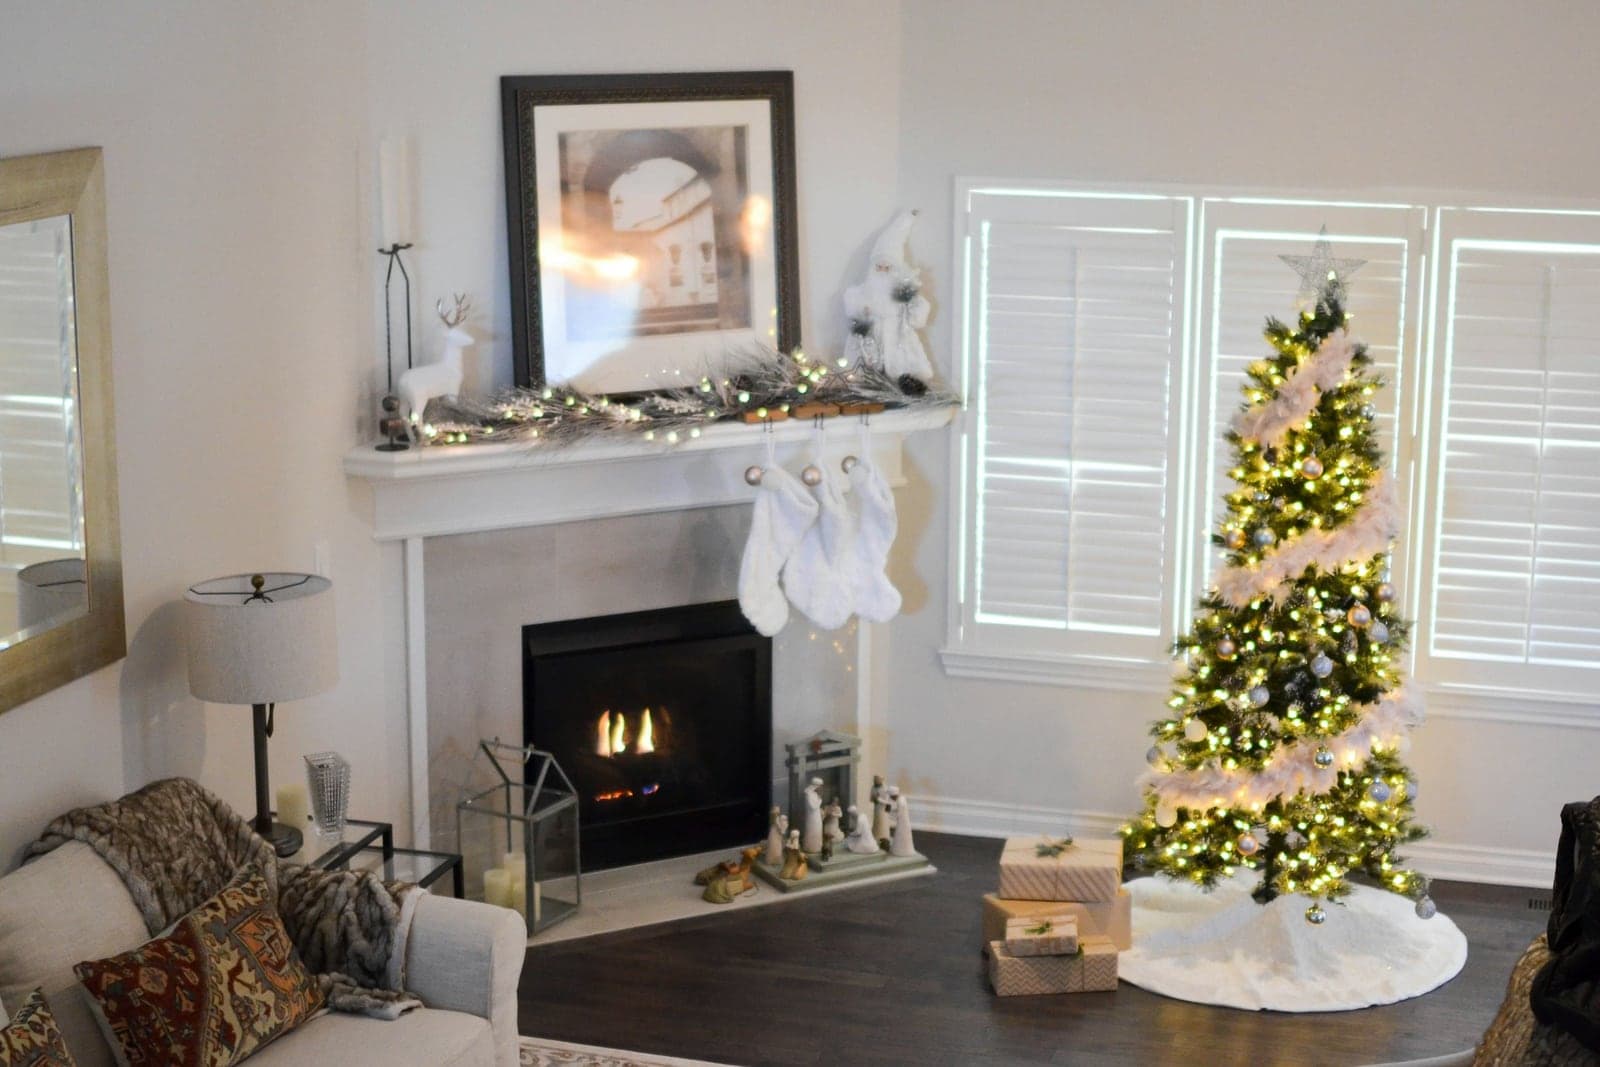
How to Decorate a Christmas Tree (Like You Hired Someone)
Here is the uncomfortable truth about those trees you see in hotel lobbies and design magazines: the ornaments are usually nothing special. Plain glass balls, mostly. What makes a professionally decorated tree look expensive is not what's on it, it's the order things went on and the sheer quantity of material used. Designers follow a strict sequence, and they use roughly twice as much of everything as the average family does.
Both of those are completely copyable. The sequence costs nothing, and the quantities are mostly lights and ribbon, the cheapest things on the tree. This guide walks through the professional method step by step: fluffing, lights, ribbon, ornaments, topper, skirt, in that order, with the actual numbers pros use. Budget two to three unhurried hours, put something good on in the background, and your tree will look like you hired someone.
First, the two rules that do most of the work
Rule one: sequence is everything. Lights go on before ribbon, ribbon before ornaments, and the topper near the end. The reason is depth. Each layer needs to be tucked into the tree, and you can only reach the interior of the branches while the layers on top of it don't exist yet. Decorate out of order and everything ends up sitting on the surface, which is exactly the flat, draped-on look you're trying to avoid.
Rule two: use more than feels reasonable. The single biggest difference between an amateur tree and a professional one is quantity. For a standard 7.5-foot tree, plan on:
- 750 to 1,100 mini lights (100 to 150 per vertical foot)
- 70 to 75 feet of ribbon (9 to 10 feet per foot of tree height)
- 110 to 150 ornaments (15 to 20 per foot), in at least three sizes
If those numbers made you flinch, good. That flinch is the gap between your tree and the one in the magazine.
And before any of it: pick a palette. Two colors plus a metallic is the formula that makes a tree read as designed rather than accumulated. Deep green and burgundy with brass. Ivory and blush with champagne gold. Navy and silver with white. The specific combination matters far less than the discipline of committing to one before you open a single storage bin, because the palette decides which ribbon you buy, which ornaments make the cut this year, and which ones sit out. (Sentimental pieces are exempt from the palette. They always make the cut; more on that in Step 4.)
Step 1: Fluff and shape (the step everyone skips)
If you have an artificial tree, this is 45 minutes of unglamorous work that matters more than any ornament you own. A tree comes out of the box with its branches pressed flat like a folded umbrella, and no amount of decoration hides un-fluffed branches.
Work from the bottom up, one branch at a time. Separate every individual tip and bend them in three different directions: some up, some down, some straight out toward you. The goal is to fill visual gaps and create the slightly irregular, layered silhouette of a real evergreen. Step back every few minutes and squint at the outline; gaps read instantly from across the room. Wear long sleeves, because artificial needles win every argument with bare forearms.
Got a real tree? Your version of this step is a fresh cut, a full water reservoir, and patience: give the branches a day to relax and settle before you decorate, or you'll be re-hanging ornaments as they droop. (Still deciding which way to go? Our comparison of real Christmas tree types and our artificial tree buying guide cover both routes honestly.)
One more piece of prep worth thirty seconds: confirm the tree actually fits the corner you have planned, topper included. The tree size calculator does the ceiling-height math for you, including the clearance the topper needs.
Step 2: Lights first, and more than you think
Lights are where most trees quietly fail. The standard advice of "100 lights per foot" is the floor, not the target. Professional installers work closer to 150 per foot, which is how their trees seem to glow from the inside rather than blink politely from the surface. On a 7.5-foot tree, that's the difference between 750 lights and 1,100, maybe twenty dollars of difference at the store, and all the difference in the world at night.
Technique matters as much as count. Don't drape strands around the outside of the tree like a barber pole. Instead:
- Start at the top, at the trunk, with the plug end of your last strand reaching the outlet at the bottom.
- Work in vertical triangles. Weave each strand from the trunk out to the branch tip and back, moving down and across a wedge-shaped section of tree, then start the next wedge.
- Wrap into the depth. Push some of every strand toward the trunk. Interior lights are what create that lit-from-within glow, and they hide the wires for free.
- Plug in as you go. Check the effect every couple of strands from across the room, and fix dark pockets now, not after the ornaments are on.
On the lights themselves: warm white LED minis are the designer default for good reason. They flatter every ornament color, they run cool enough to nestle against branches all season, and a thousand of them cost pennies a night to run. Match the color temperature across every strand you buy (one cool-white strand in a warm-white tree sticks out like a fluorescent office bulb), and if you're mixing in colored lights, keep it to one accent strand ratio rather than half the tree. Before you buy, run your tree height through the Christmas light calculator so you walk into the store with an actual number instead of a guess.
If your tree is pre-lit, check it honestly against the 100-per-foot floor. Plenty of pre-lit trees ship with 500 or 600 lights on a 7.5-foot frame, which is respectable but not glowing. Nothing stops you from weaving one or two extra strands into the interior, and it's the cheapest upgrade a pre-lit tree can get.
Step 3: Ribbon and garland (the professional's shortcut)
Ribbon is the highest-leverage move on this entire list. It fills volume fast, it establishes your color story before a single ornament goes on, and it's the thing people mean when they say a tree looks "done." It's also the step people are most afraid of, because badly done ribbon (wound tight around the tree like packaging tape) looks worse than no ribbon at all.
The professional method is vertical, not horizontal:
- Cut the ribbon into 3-to-4-foot lengths. Nobody wrestles a 30-foot roll around a tree; that's how you get the packaging-tape look.
- Tuck one end deep, right against the trunk, pinched around a branch to hold it.
- Let it billow. Pull the ribbon out toward the branch tips, give it a soft twist or loop, then guide it back into the tree lower down and tuck the tail. Each piece should read as a loose S-curve cascading down the tree, with air in it.
- Stagger the cascades around the tree so no two line up vertically, and step back after each one.
Quantity again: 9 to 10 feet of ribbon per foot of tree height, so roughly 70 to 75 feet for a 7.5-foot tree. Wired ribbon is non-negotiable; it holds the billows you shape instead of collapsing into sad streamers. A 2.5-inch width is the sweet spot on a full-size tree, and two coordinating ribbons (one patterned, one textured solid) layered in alternating cascades is the easiest designer trick in this whole guide. Our Christmas ribbon buying guide breaks down widths and wired grades if you're starting from zero.
Prefer garland to ribbon? Same logic, same placement: drape it loosely in swags with real slack, tucked into the branches at each contact point, never pulled tight.
Step 4: Ornaments, in layers (sizes, depth, and the count)
Now, finally, the ornaments. The pros hang them in a deliberate order, and the order is what creates depth.
Start with your largest ornaments, the 4-to-6-inch statement pieces. Place them first, spaced evenly around the tree, and hang several of them deep inside the branches, close to the trunk. This feels wrong the first time you do it. Do it anyway. Interior ornaments catch interior light, hide the tree's structure, and give the eye somewhere to travel; they're the single clearest tell of a professionally decorated tree. Roughly a third of your ornaments should sit at this interior depth, a third mid-branch, and a third out on the tips.
Then the mid-size workhorses, your 2.5-to-3-inch balls in the core palette. These do volume. Hang them at all three depths, clustering occasionally in odd-numbered groups of three rather than spacing everything with metronome regularity. Perfect even spacing reads as cautious; loose rhythm reads as styled.
Finish with the small and special pieces. Small ornaments (1 to 2 inches) belong mostly in the top third of the tree, where the branches are shortest, so the whole tree stays in proportion. The sentimental pieces, the kids' handprints and the inherited glass birds, go on last, front and center at eye level. A designer tree that hides the family pieces has missed the point of the entire exercise.
Mix your finishes, too. A tree of all-shiny ornaments glares; a tree of all-matte ones goes flat. The designer ratio is roughly equal parts shiny, matte, and textured (glitter, mercury glass, wood, felt), because the mix catches light differently across the tree and creates dimension even within a strict two-color palette. This is also the guilt-free answer to what to do with a tight color scheme: you don't need more colors, you need more finishes.
The count, one more time: 15 per foot for polished, 20 per foot for lush. A 7.5-foot tree wants 110 to 150 ornaments. If that's more than you own, buy plain glass balls in one or two colors to build the base layer; they're inexpensive, and they're literally what the professionals use. And if you haven't settled on a palette at all, our ornament ideas by decorating style matches color stories to the house you already have, from farmhouse to Scandinavian to traditional.
Two small hardware upgrades while you're at it: swap flimsy wire S-hooks for green floral wire or ornament hooks you actually crimp closed, and hang heavy ornaments close to the branch join, not the tip.
Step 5: The topper
The topper goes on second to last, not first (you'll knock it crooked a dozen times if it's on during the ornament phase) and not at the very end (you want to style the top branches around it).
Three things separate a good topper moment from a wobbly one. Scale: on a full-size tree, a topper under about 8 inches disappears; most trees want 10 to 14. Attachment: wire it to the leader branch with floral wire rather than relying on the cone alone, and reinforce the leader with a green bamboo stake if your star lists to one side. Clearance: you want 6 or more inches between topper and ceiling so it reads as a finial, not a squeeze. If stars and angels feel expected, a generous bow with ribbon tails cascading into the tree, or a spray of picks and branches fanned out from the top, is very current and very forgiving.
Step 6: The skirt, and the last ten percent
The floor is part of the tree. A bare metal stand under a beautiful tree is like dress shoes with no socks, and this is the two-minute fix that finishes the whole picture.
A full-size tree wants a 48-to-60-inch skirt so the proportions hold; measure your bottom branch spread and match it. Faux fur reads most expensive per dollar, a woven basket collar is the clean modern option, and either beats the shiny satin circle that came free with the tree stand. (We compared the options in our tree skirts and collars buying guide if you want the short list.)
Then the final pass. Turn off the overhead lights, plug in the tree, and walk a slow circle. Fill dark pockets by shifting an ornament or tucking a light strand deeper. Check the tree from the doorway you'll actually see it from most, and from outside the front window if it faces the street. This ten-minute edit at the end is, quietly, the most professional step of all: pros never call a tree done from two feet away.
The five mistakes that flatten a tree
If your finished tree looks "fine" instead of finished, it's almost always one of these:
- Skipping the fluff. Twenty minutes of branch-shaping beats fifty dollars of new ornaments. Every time.
- Underlighting. 300 lights on a 7.5-foot tree is a night light, not a Christmas tree. Get to at least 100 per foot, ideally 150.
- Everything on the tips. Ornaments hung only at the branch ends make a tree look like it's wearing its decorations rather than made of them. Bury a third of them.
- One ornament size. All 2.5-inch balls, evenly spaced, reads as gift-shop display. You need big anchors, mid-size volume, and small pieces up top.
- Tight ribbon. Ribbon wound snug around the tree in a spiral is the fastest way to make good materials look cheap. Cut it, tuck it, let it billow.
The short version
Fluff every branch. Lights first, 100 to 150 per foot, wrapped into the depth. Ribbon in vertical cascades, 9 to 10 feet per foot of tree. Ornaments in three sizes and three depths, 15 to 20 per foot, sentimental pieces at eye level. Topper wired on with ceiling to spare, a skirt that matches the tree's spread, and a slow lap with the room lights off to finish.
That's the entire professional playbook. None of it requires taste you don't have or money you don't want to spend; it's sequence and quantity, patiently applied. And when you've hung the last ornament and stepped back, get your bragging rights in writing: upload a photo to our Rate My Christmas Tree tool and see how your finished tree scores against the designer checklist you just followed.
Share this guide
Frequently asked questions
What order do you decorate a Christmas tree in?
How many lights do you need for a Christmas tree?
How many ornaments should go on a Christmas tree?
How do professionals put ribbon on a Christmas tree?
Do lights go on before or after ornaments?
How do you make a Christmas tree look fuller?
Keep reading
Christmas Tree Ornaments: How to Choose and Arrange Them (by Style)
How to decorate a Christmas tree that looks designed, not decorated. How many ornaments you actually need, the pro layering method, ornaments by decorating style, and the heirloom-vs-themed-tree question settled.
How Many Christmas Lights Do You Actually Need? (Tree, Roofline, and Yard)
How many Christmas lights you need for a tree, roofline, bushes, and wrapped trees, with clear per-foot rules of thumb, a tree-size chart, how many strands you can safely connect, and why to buy 10-20% extra.
The Best Christmas Ribbon and Bows to Buy (and How Much You Need)
How to choose Christmas ribbon and bows, and what's actually worth buying, by where it goes: the tree, wreaths and garland, gifts, the mantel and staircase, and outdoors. Wired vs unwired, the right width, and how much to buy.
Prefer pen & paper?
The Christmas Planner
A 25-page printable kit covering budget, gifts, hosting, and decor, built on the same planning logic as this tool. Print it once, keep it in a binder, and reuse it every year.
Or grab 3 pages free first.
Decor that suits the home you have.
Seasonal decorating tips and the occasional new tool, straight to your inbox. One list, no spam.